


Many designers and engineers find themselves repeating the same or similar tasks as part of their modeling workflows. With SOLIDWORKS, there is a powerful tool available that can assist them in automating many of these tasks.
The SOLIDWORKS Application Programming Interface (API) is used to automate redundant and lengthy design tasks using SOLIDWORKS software. It is also used to create complete engineering application that run inside or outside of the SOLIDWORKS application.
The quickest and easiest way to start programming with SOLIDWORKS API is to record a macro and modify it to fit your work site’s needs. Macro recording can be done using the SOLIDWORKS C#, VB.NET or VBA macro recorder. You can record any operation performed with the SOLIDWORKS user interface and replay them using SOLIDWORKS macros. A macro contains calls to the API that are equivalent to operations performed in the user interface. A macro can record mouse click, menu choices and keystrokes.
Macro Toolbar

The Macro toolbar contains shortcuts to the macro recording commands. You can also access these commands from the Tools, Macro menu.
By default, the Macro toolbar is turned off. To create and use your macros , it is best to view and dock the macro toolbar at the top of the SOLIDWORKS window. From the View menu, select Toolbars, Macro.
 Run - launches the Run Macro dialog box, where the user selects the macro to execute.
 Stop - launches the Save As macro dialog box, where the user enters a valid name and extension for the macro. If the save is cancelled, a prompt appears that allows the user to continue or cancel the recording.
 Record/Pause - allows the user to begin or pause macro recording.
 New - performs three steps: First, it launches the New Macro dialog box where the user chooses the macro type, enters a valid path and name for the macro.
Next, the macro file is populated with standard lines of programming code to connect to the SOLIDWORKS software.
Finally, the VBA or VSTA editor opens the macro file for the user to begin programming.
 Edit - launches the Edit Macro dialog box for selecting the macro to view or modify.
Now, how do we create a Macro?
1.) Start the SOLIDWORKS software and create a new part.
For this part, use the default Part template.
2.) View the Macro Toolbar.
If the Macro toolbar is not visible, then from the View menu, choose Toolbars, Macro.
3.) Click Record.
4.) Select Front Plane.
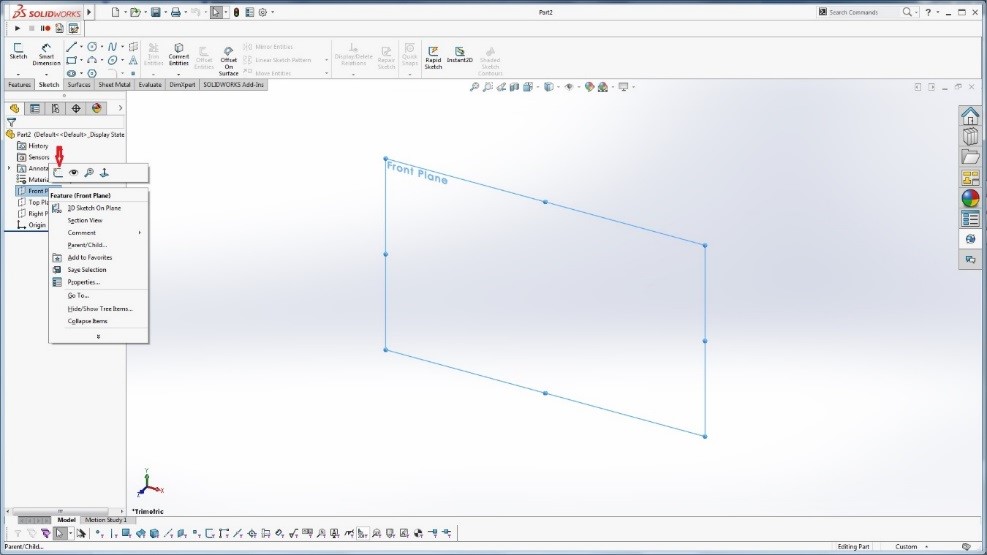
5.) Click Sketch  .
.
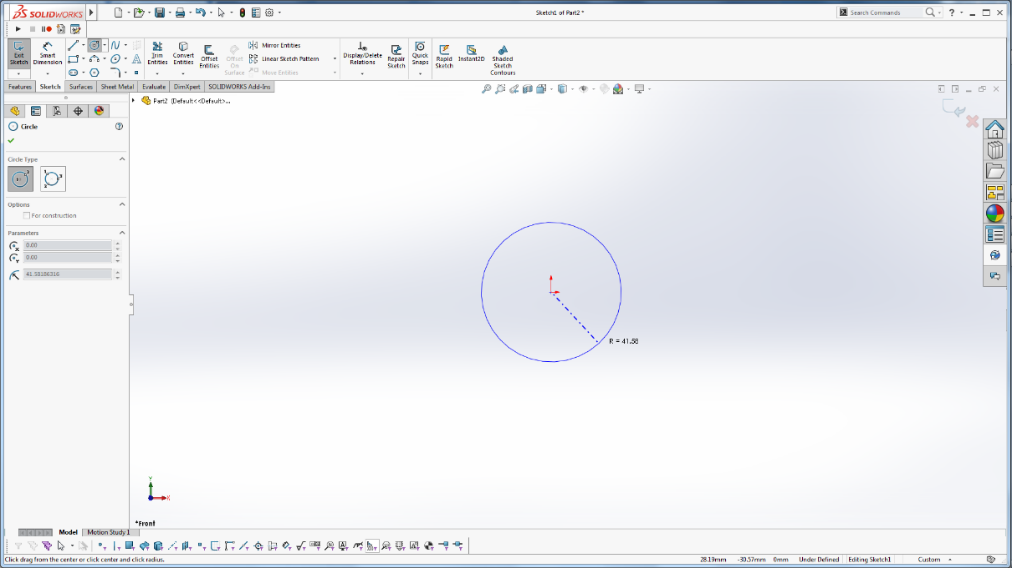
6.) Click Circle  .
.
Drag to an approximate radius of 40 millimeters, then enter the exact value 40 mm in the PropertyManager.
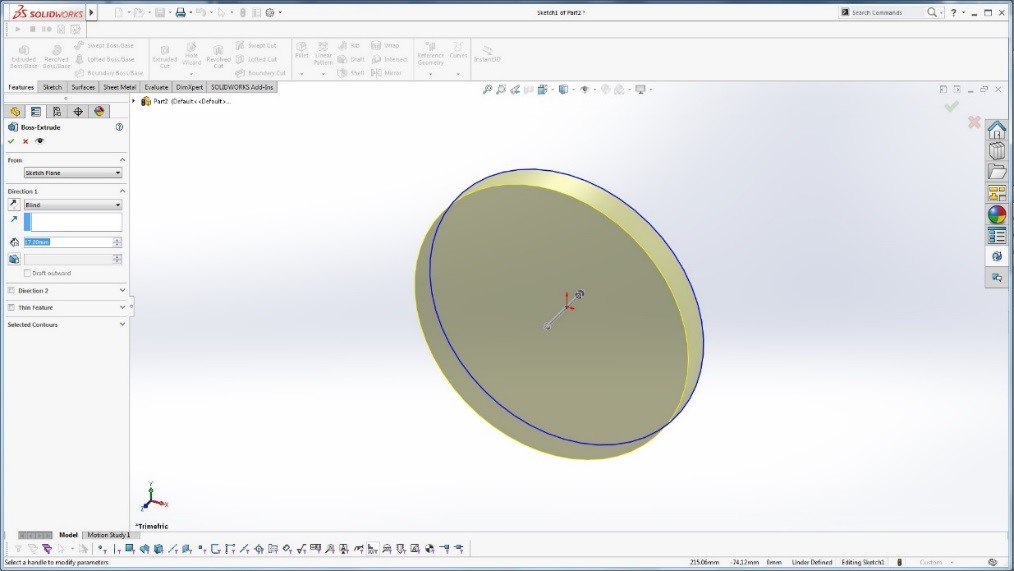
7.) Click Extruded Boss/Base.
Drag the extrude path approximately 15 millimeters, then enter the exact value 15 mm in the PropertyManager. Click OK.
8.) Click Stop .
9.) Save the macro.
In the Save As dialog, choose SW VBA Macros (*.swp) from the Save as type: drop-down list. Save he macro as Macro1.swp.
10.) Delete all Features.
Remove the extruded base and sketch created previously.
11.) Click Play.
Select Macro1.swp from the previous step.
12.) Click the Edit button from the Macro toolbar.
Select Macro1.swp.
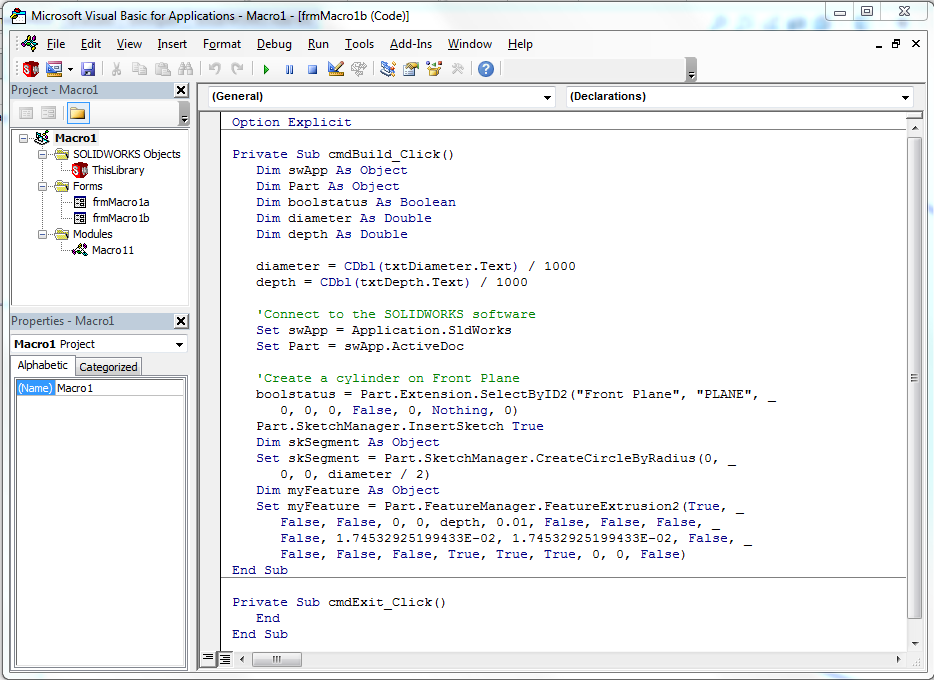
13.) Congratulations!!! You now have your first macro codes and you can start editing/modifying the macro code based on your requirements.
You can have the advantage of this powerful tool using SOLIDWORKS. These capabilities help companies to take projects from conception to completion with the highest efficiency, and in the shortest possible timeframe. SOLIDWORKS offers a complete 3D software tools that let you create, simulate, publish, manage.


